Ice Lolly peg magnet DIY

To celebrate this gorgeous weather we’ve been having in the UK, I thought I’d share a suitable summer DIY for you to get you all in the mood for ice cream (although, to be honest, there’s always a suitable excuse to eat ice cream!)
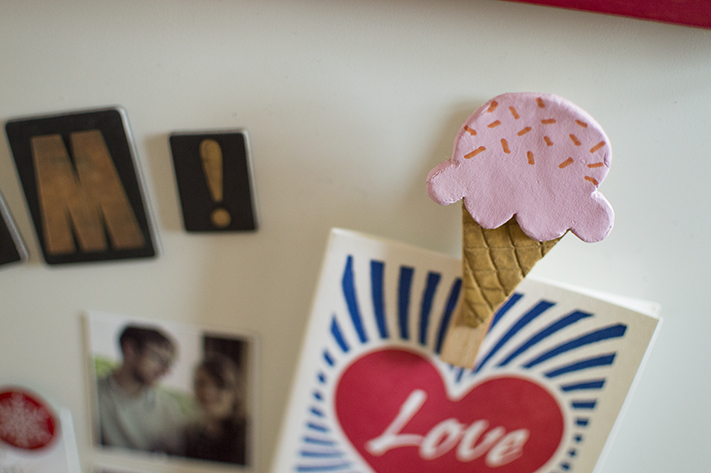
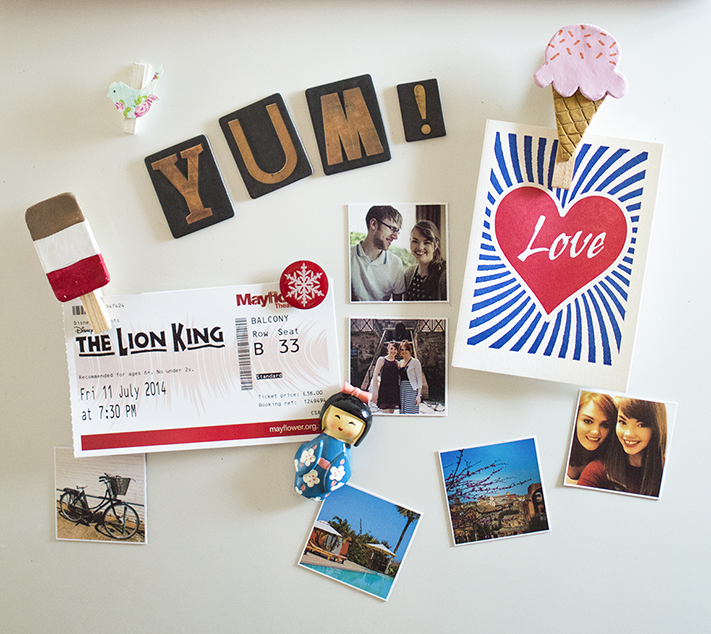
These fridge magnets are really useful because they’re backed on to pegs so you can clip up your little notes and shopping lists as well as pinning other bits and bobs down with the magnet. Currently adorning our fridge door, these put a smile on my face as I remember summer is around the corner! They’re super simple to make and extremely customisable – and no calories here!
You will need:
Clay (air dry or oven bake)
Craft knife
Paint
Glue
Wooden pegs
Small magnets
Nail file or sandpaper
1. Roll out your clay to about a quarter of a cm thick – you don’t want it too heavy or the magnet won’t hold it! Shape it into a lollipop shape, or an ice cream cone, whatever you fancy. Don’t forget to use your peg to measure the size so it’s not too big!
I made the ice cream cone in two parts, painted them separately and glued them together once dry which saved a lot of hassle! For the waffle cone, I scoured in a diamond pattern with the end of my paintbrush to add some texture. Leave them to dry, or bake them following the packet instructions.
2. When they’re dry, depending on the clay, you might want to file the edges. I just used a nail file which worked really well, and it meant the corners were round and suitably smooth.
3. Now it’s time to paint! You can go crazy with this – I made a rocket lolly design, twister, fab and of course the simple ice cream cone. Whatever your favourites are (mines the Fab!)
4. Then, finally, just use your strong glue and attach them to the pegs, and then the magnets. These are really simple to make, but do make sure you leave the glue to dry so they adhere properly or they’ll fall apart!
Pop on the fridge or your memo board and you’re all set for summer. Now time to write the shopping list for the BBQ!